
If you want to try this software, please download ScannerTrimmer.zip, extract that and execute ScannerTrimmer.exe in that. And you will see a main window like figure below.
You can process input images by dropping input image files from Windows Explorer after change settings by the main window.

Minimum setting you must specify to execute is only Empty-image path scanned with no manuscript (1) and Edges for trim (2). If you specify Empty-image path you can choose 'auto' (default) in Edges for trim (2). But if you don't, you must specify a option excepting 'auto' in Edges for trim (2). You can specify no-manuscript path by "Select by Dialog" button.
After this, please drop input files from explorer to execute processing. Processed images will be save in a folder named by editbox of 'Save locatoin' created as subfolder of a folder that is a parent folder of dropped files.
Empty-image path scanned with no manuscript
Specify image path scanned with no manuscript to (1). If you do not use no-manuscript image specify empty string in that. You can specify the path directry by keyboard, by selecting with open dialog box, by selecting one from dropp down list, or drop file from explorer to the combobox. If you want to use open dialog box, push "Select by Dialog" button. You can specify a path by drop down list if you have executed in times past. Drop down list consists of newest 16 pathes in past execution. If you want to drop a empty-image file from explorer, you must drop a file inside of the combo box (The combo box appearance will be change when mouse cursor is inside of that). And if you drop multiple files from explorer, the first dropped path is specified as empty-path and remain pathes can be used as input pathes.
And, you can open empty-image by pushing "Open image" button.
Options
Edge for trim
Edge for trim (2) is auto as default. If you can not get good results, selection of this may cause goot results. If you do not use no-manuscript image, you must select a option excepting 'auto'.
- auto - automatic detection of background
- left, top, right, bottom - trim left, right, top and bottom sides
- right, bottom - trim right and bottom sides
- left, top- trim left and top sides
- right, top - trim right and top side
- left, bottom - trim left and bottom side
- left, right - trim left and right side
- top, bottom - trim top and bottom side
- left - trim left side
- top - trim top side
- right - trim right side
- bottom - trim bottom side
Edge for automatic rotation
Edge for automatic rotation is "auto" as default. If you want this application to exhibit rotation, please select "no rotate". If manuscripts are not rectangle precisely, you must specify the edge to rotate.
- no rotate - skip rotation processing
- auto - most linear edge is used to calculate rotation angle
- left - left side of the manuscript is used to calculate rotation angle
- right - right side ...
- top - top side ...
- bottom - bottom side ...
- left/right alternate - left side is used with first, third, ..., right side is used with second, forth, ...
- right/left alternate - right side is used with first, third, ..., left side is used with second, forth, ...
- top/bottom alternate - top side is used with first, third, ..., bottom side is used with second, forth, ...
- bottom/top alternate - bottom side is used with first, third, ..., top side is used with second, forth, ...
Prior to cutting edges than keeping manuscript
Check if you want to trim background than keeping manuscript fragments.
Output size
Check if you want to specify the output image sizes. Only trimming is processed (No magnify). So if input image sizes are the same then the trimming sizes will be the same too.
Additional trimming
Check if you want to specify the additional extra-trimming values after auto-trimming. If you wan to specify auto-trimming values, you must use 'Output size'.
Save location
Processed images are saved in a subfolder of a folder that have dropped input image files as children. The subfolder name can be specified by using a editbox. You can specify the name by typing or selecting one from drop down list. The drop down list has the name history of 16 in past execution.
Save image type
You can select a save image format by radio buttons.
"Windows Bitmap" is a format that enables us to save images with no compression. This fomat images can be opened by many applications. But because of no compression, file sizes of images are large.
"PNG" is a format that enables us to save images with lossless compression. Because of compression, The file sizes are small comparing with "Windows Bitmap" format. But because of lossless compression, files sizes are large comparing with "JPEG" format especially with photo like colorfull complex images.
"JPEG" is a format that enables us to save images with lossy compression. This format make it possible that choosing image quality and compression wait. High image quality make filesizes large (max is 100), and Low image quality make these small (min is 0) relatively.
Advanced Option
Threads
Specify the thread count for excuting. It affects only when multiple files are drepped.
Execution by dropping
You can process images by dropping files from explorer into an area excepting an area of Empty-path combobox (1). Execution will be caused immediately after dropping. An area will be show result images one by one as processing. You can terminate processing to press "Stop" button. You can open a folder that has result images by pressing "Open Folder" button after processing.
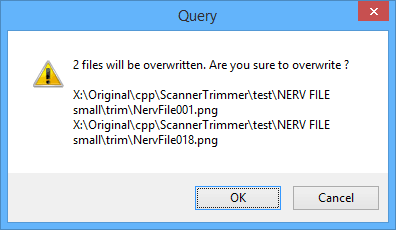
Immediately after dropping files, you may see a dialog like figure below. In this case, existing several files will be overwrite. Push "Yes" to delete existing collision files and start execution. Push "No" to terminate exection.
About...
Push "About..." button to show about dialog box.
Exit
Push x button on the right-top side of the window.
Download
This software is a shareware, so only trial use is permitted with no fee. Please purchase if you use this software in practice.

Contact
Use mail form to contact me.